REPAIR Module
⚙️
REPAIR
Here you will find a step-by-step guide for the repair module at XLR.
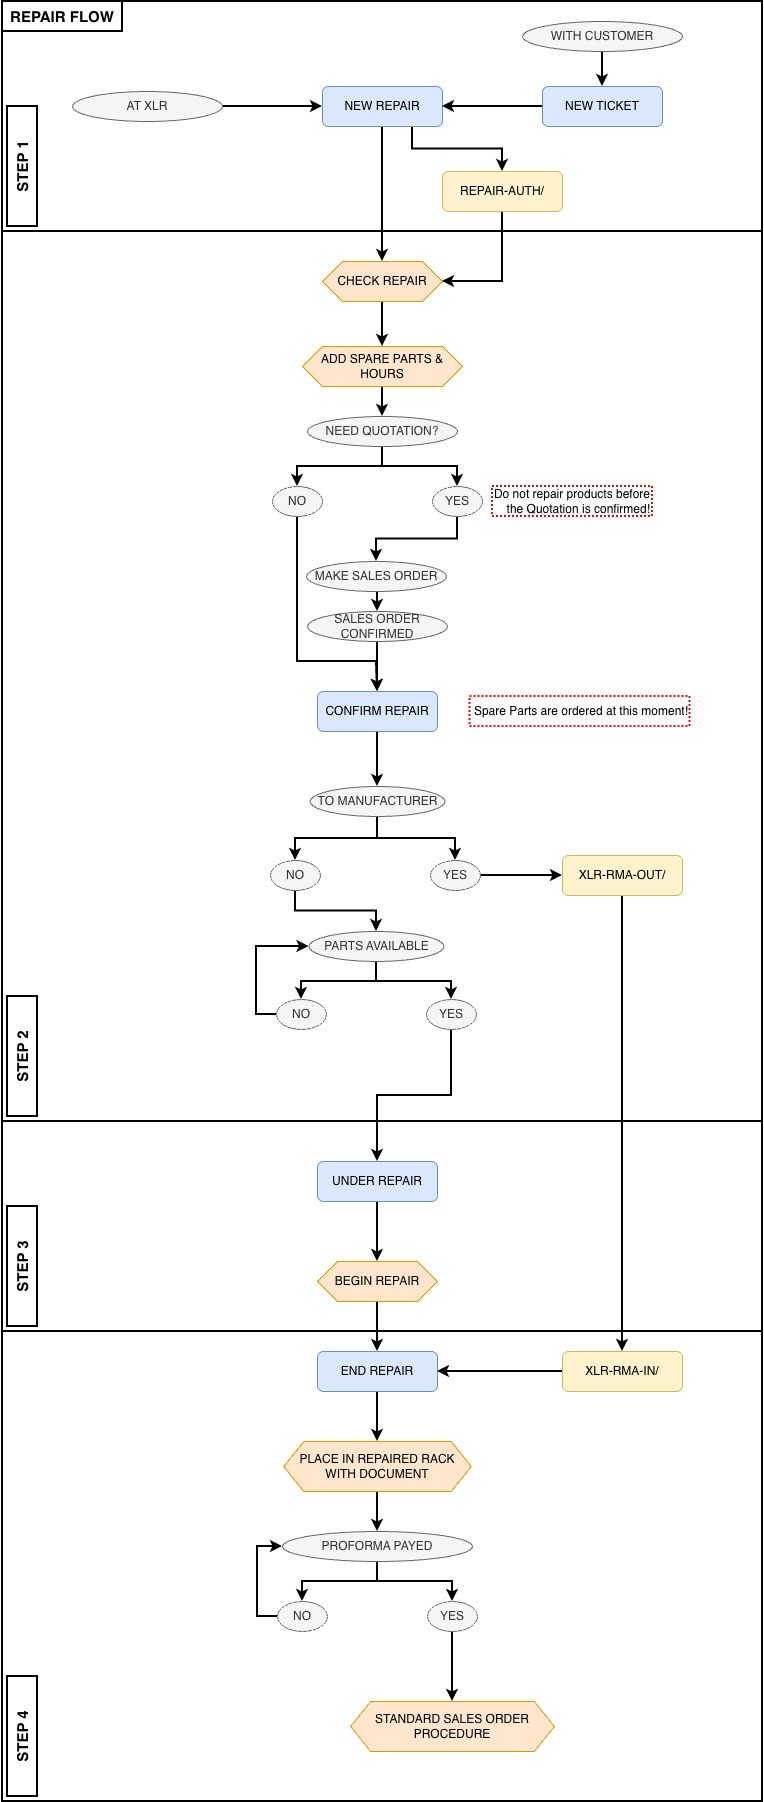
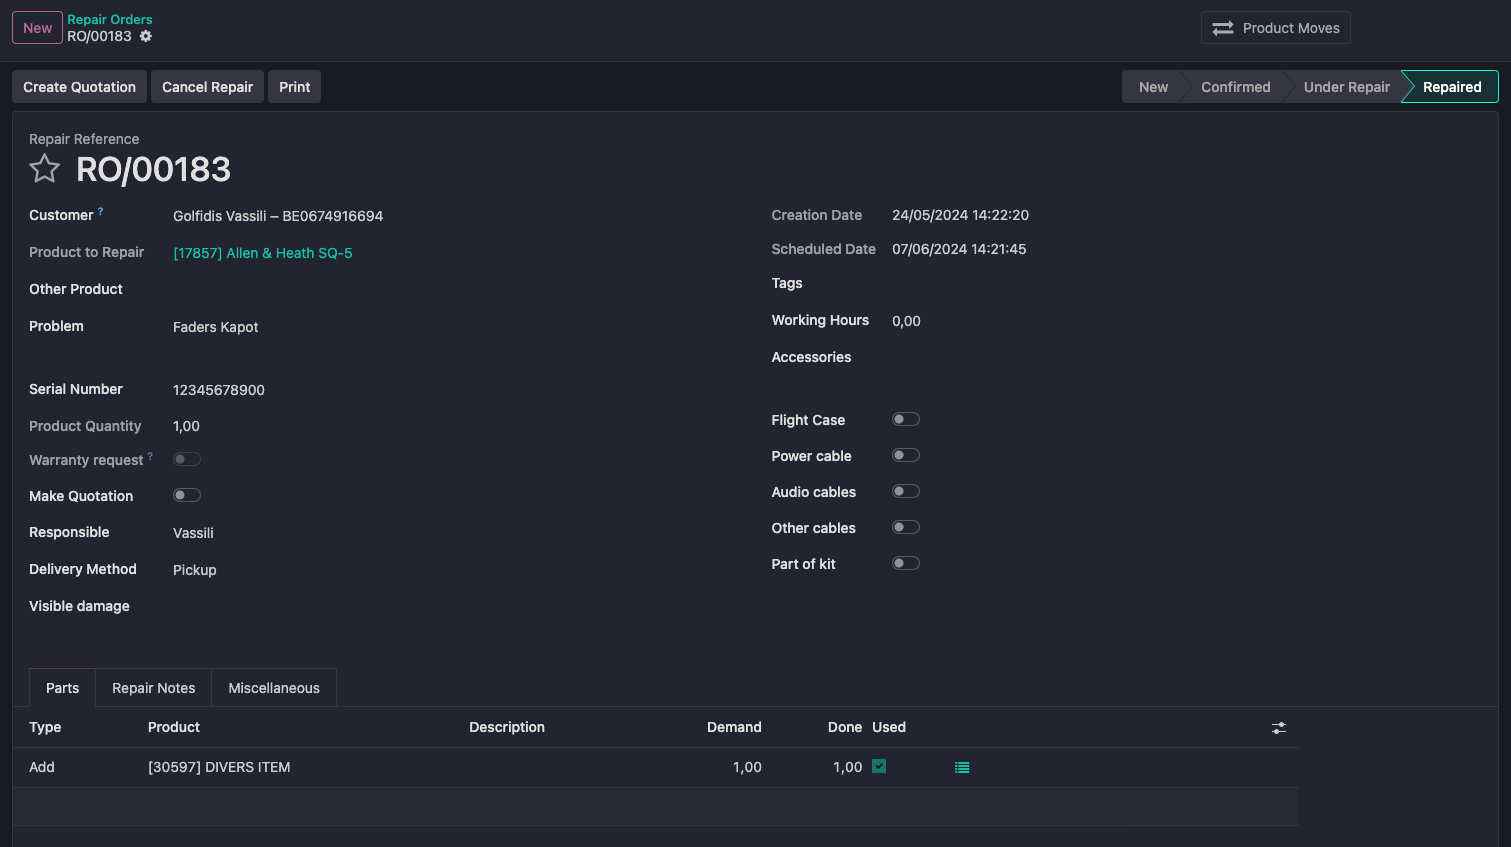
STEP 1:

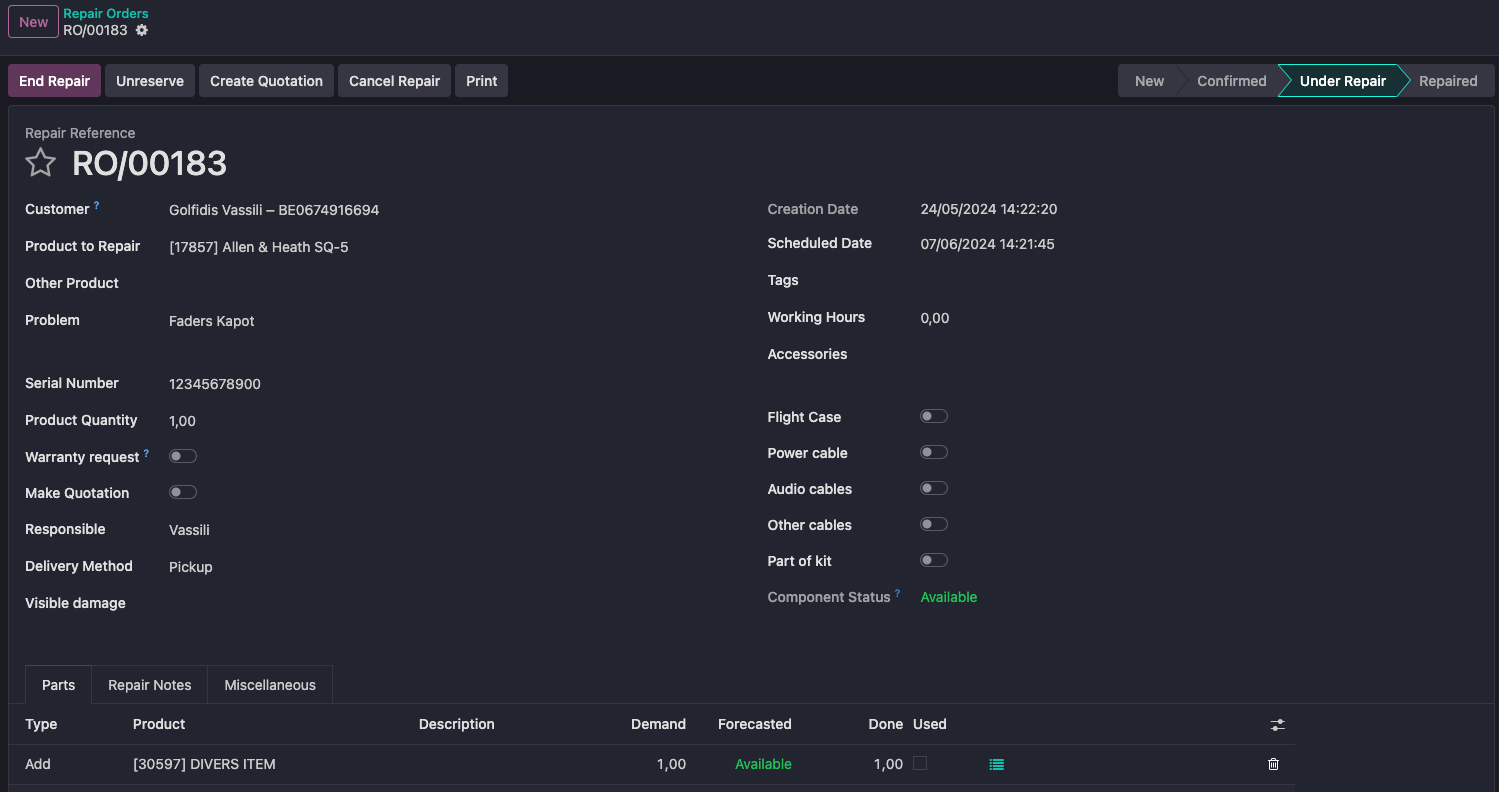
STEP 2:

STEP 3:
STEP 4: